Iris Flower (Meaning,Types and Growing Guide)
Irises are among the most stunning and beloved flowers in gardens around the world. Its name comes from the Greek word for “rainbow,” inspired by the goddess Iris, who served as a messenger between heaven and earth, traveling along rainbows to connect gods and humans.
In Greek mythology, Iris was seen as a bridge between worlds, and purple irises were often planted on women’s graves to call upon the goddess to guide their souls to the afterlife. This ties the flower to themes of guidance, transition, and hope beyond this life.
Each flower has three tall, upright petals called “standards” and three downward-facing petals known as “falls.” Many varieties feature soft, fuzzy “beards” on the falls, adding extra charm and texture.
These hardy perennials are easy to grow and care for. They love full sun, bloom reliably in spring through early summer (depending on the type), and come back year after year. Some, like the early-blooming miniature Iris reticulata, brighten gardens as soon as February or March, while Siberian irises shine in midsummer and classic bearded irises steal the show in May and June.
Beyond their looks, irises are tough, long-lived plants. Many thrive for 5 to 20 years with simple care. They’re perfect for cutting and arranging in vases. They attract butterflies and hummingbirds, making them a favorite for wildlife-friendly gardens.
In this guide, you will learn what iris flowers symbolize, best types and how to grow irises in gardens.
Iris Flower Meaning and Symbolism
Across many traditions, the iris stands for faith, hope, wisdom, courage (or valor), and trust. Its three upright petals (standards) are often said to represent faith, valor, and wisdom, while the overall bloom evokes royalty, admiration, and positive change. In the Victorian language of flowers (floriography), it symbolized messages, good news, and compliments.
Purple irises represent royalty, wisdom, respect, and admiration. Blue irises symbolize faith, hope, serenity, and clear communication. Yellow irises stand for passion, joy, and energy. White irises signify purity, innocence, and spiritual connection.
Iris Flower Characteristics

List of 10 Best Iris Flower Types for Gardens
- Bearded Iris
- Siberian Iris
- Japanese Iris
- Dutch Iris
- Louisiana Iris
- Dwarf Iris
- Spuria Iris
- Crested Iris
- Yellow Flag Iris
- Blue Flag Iris
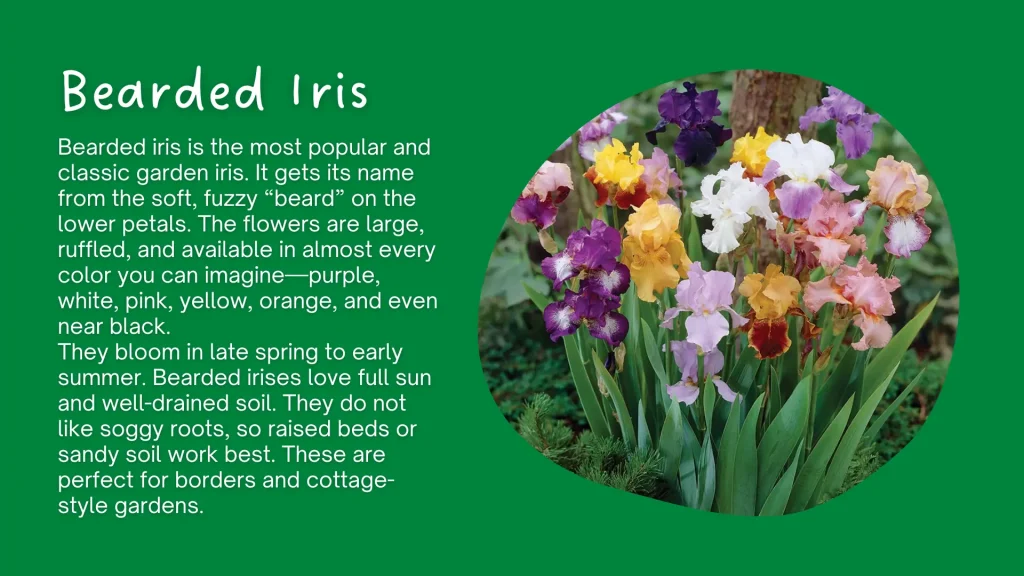
Bearded Iris
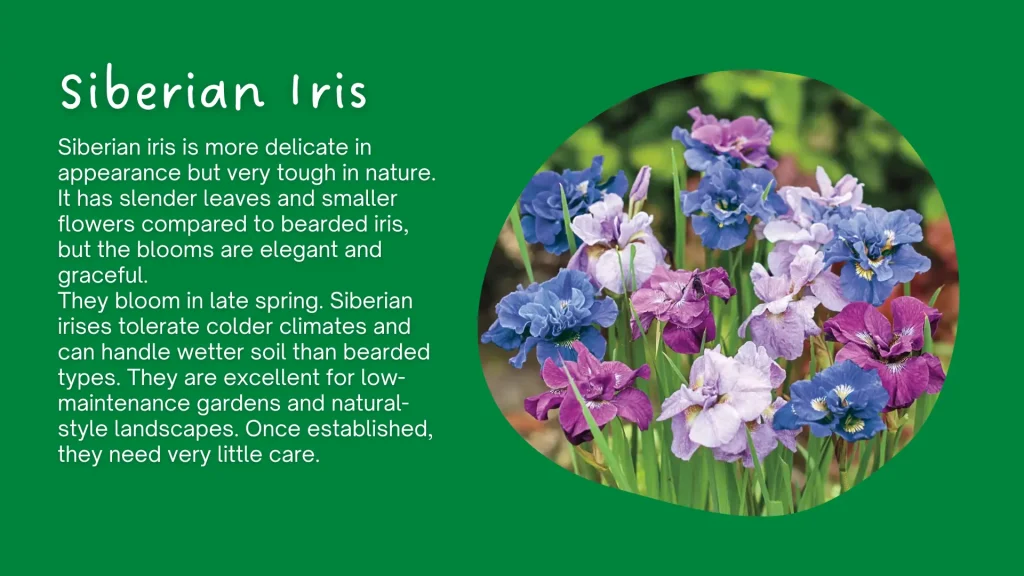
Siberian Iris
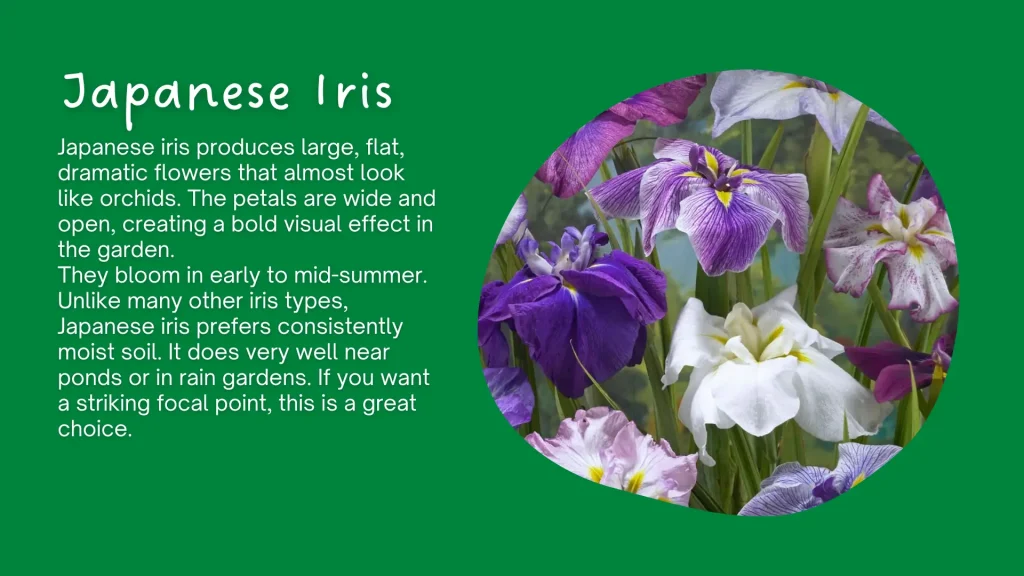
Japanese Iris
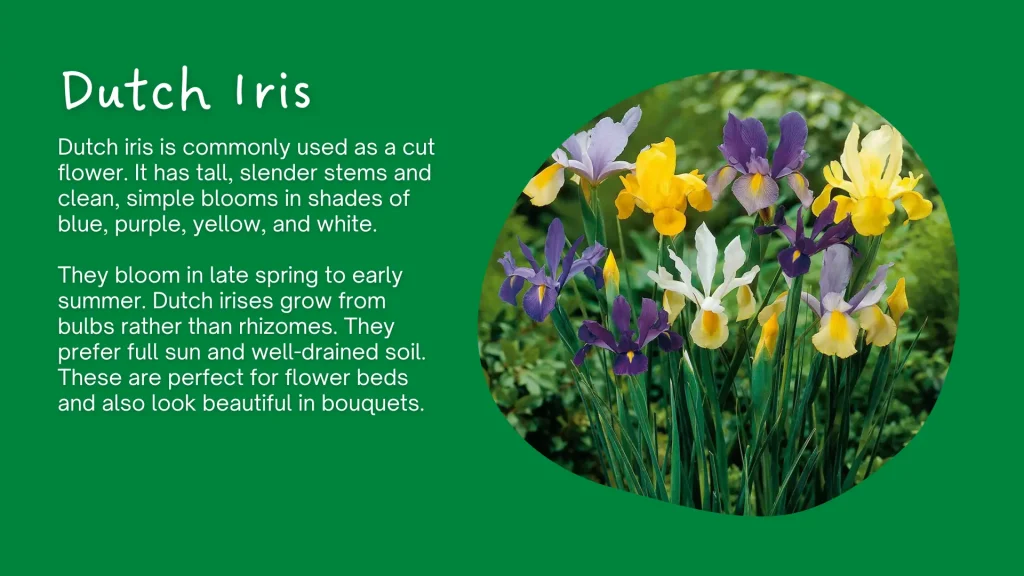
Dutch Iris
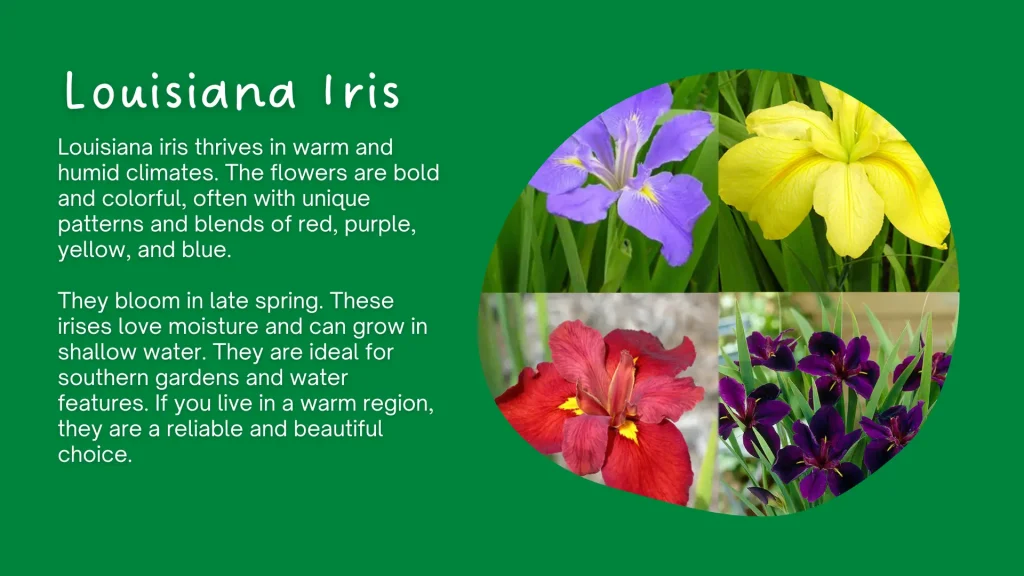
Louisiana Iris
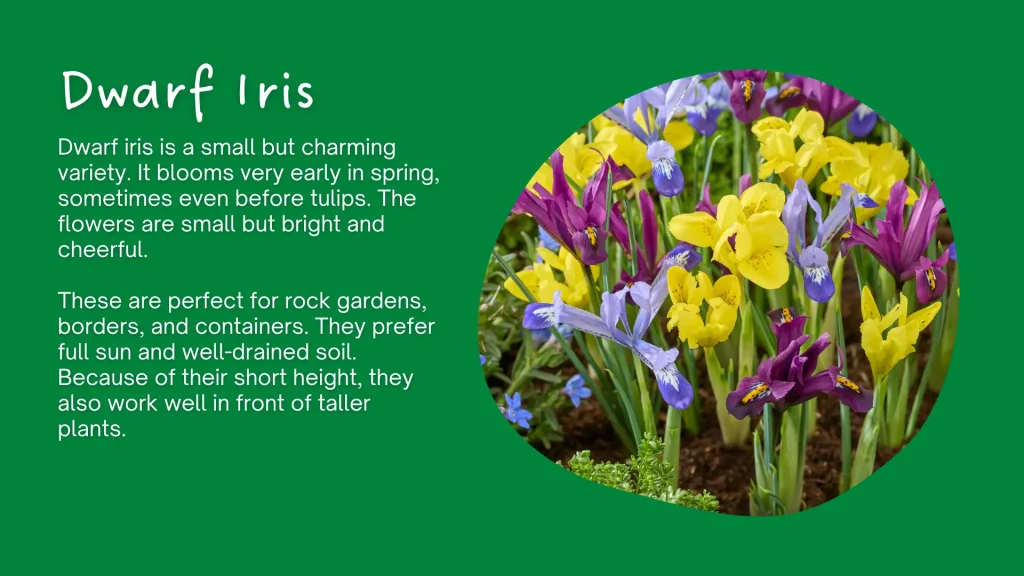
Dwarf Iris
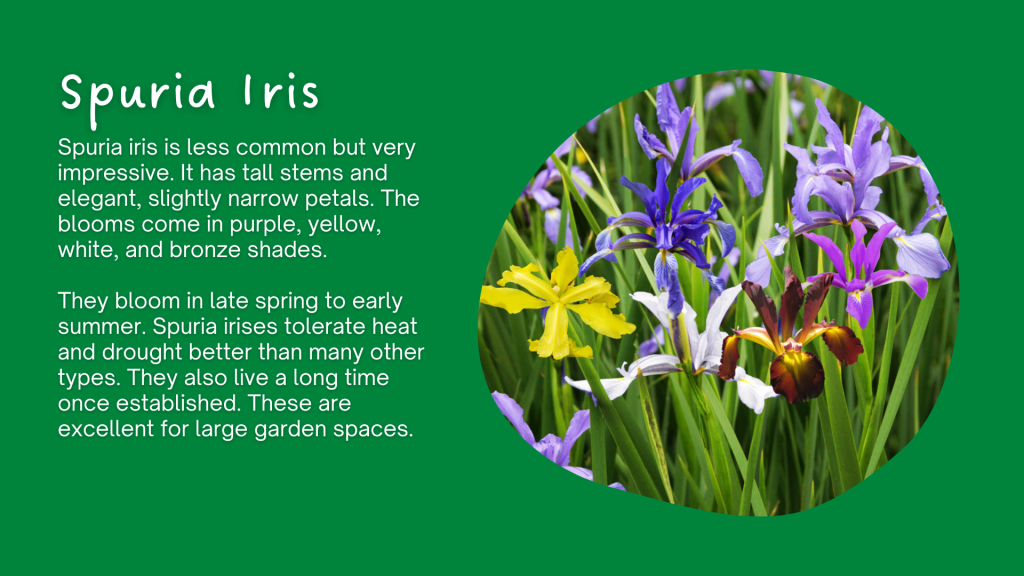
Spuria Iris
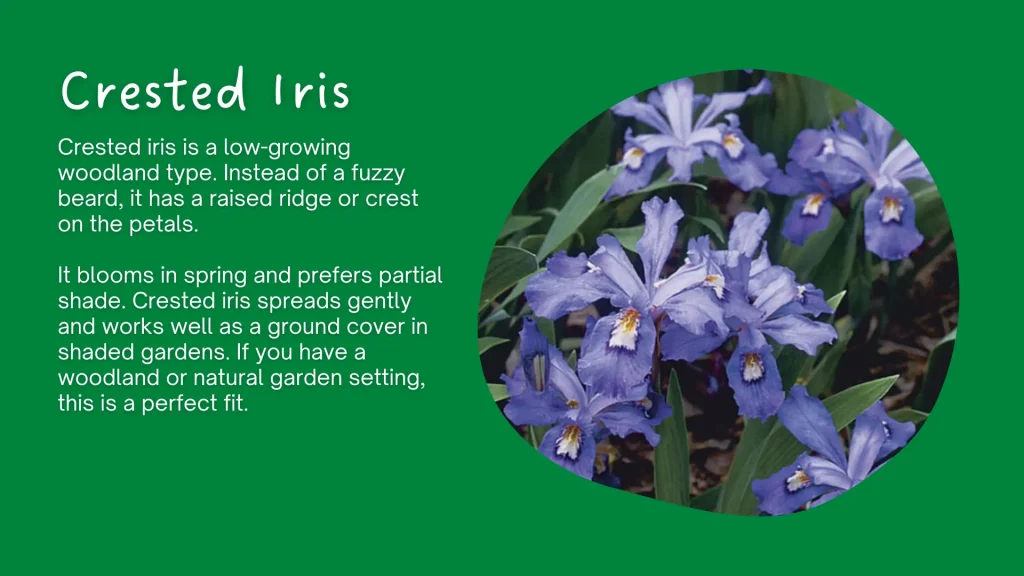
Crested Iris
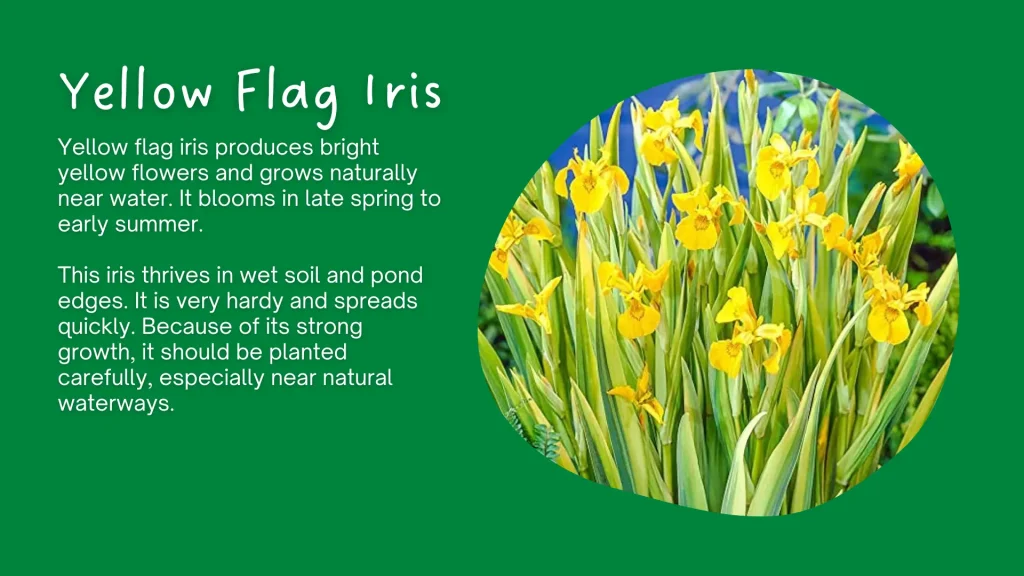
Yellow Flag Iris
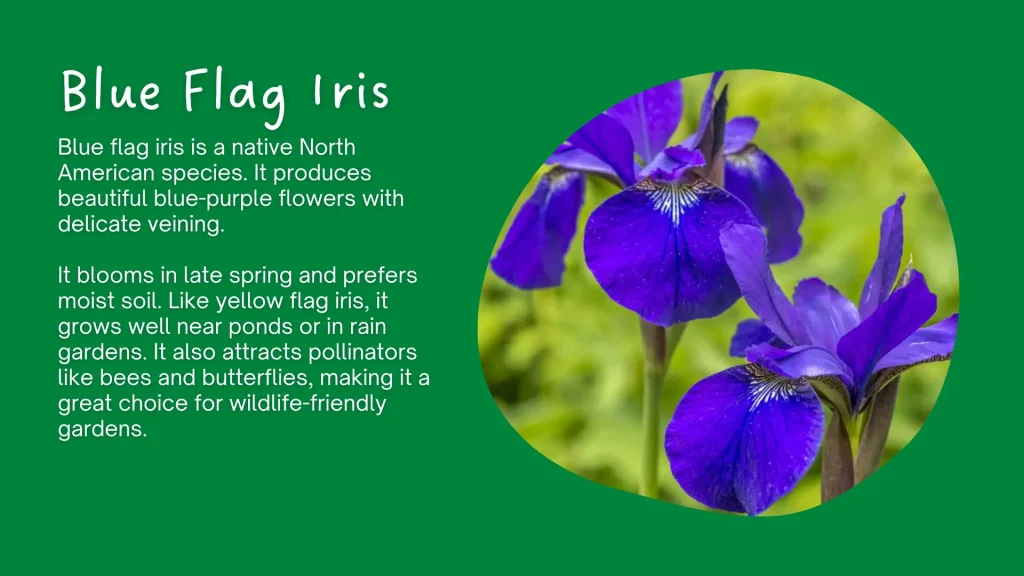
Blue Flag Iris
How To Grow Irises
Some irises grow from thick underground stems called rhizomes, while others grow from bulbs. Rhizome types, like Bearded Iris and Siberian Iris, spread across the soil surface and prefer good drainage. Bulb types, such as Dutch Iris, behave more like tulips and are planted deeper in the ground.
You also need to consider your climate and soil conditions. If you have a sunny garden with well-drained soil, bearded iris is usually the best choice. If your soil stays slightly moist or you live in a colder region, Siberian iris is more reliable and easier to maintain.
For areas near ponds or where soil stays consistently damp, moisture-loving types like Japanese Iris perform beautifully. Choosing the correct type from the start makes growing irises much easier and ensures strong, healthy blooms.
Read: How To Grow Geraniums
Best Time to Plant Irises
The best time to plant irises depends on the type you choose. Rhizome irises, especially bearded varieties, should be planted in late summer to early fall. This gives them enough time to develop strong roots before winter arrives. Planting at the right time helps them bloom better the following spring.
Bulb irises, like Dutch iris, are usually planted in fall. They need cold winter temperatures to bloom properly in spring. If you are buying potted irises from a nursery, you can plant them during the growing season, but avoid planting during extreme heat.
Choose the Right Location
Irises love sunlight. Most types need at least 6 hours of direct sun every day to bloom properly. If you plant them in too much shade, you will get lots of leaves but very few flowers. In my experience, poor blooming is often caused by lack of sunlight, not fertilizer.
Good air circulation is also important. Irises do not like crowded, damp spaces. Fresh airflow helps prevent fungal problems and keeps leaves healthy. Avoid planting them too close to walls or thick shrubs.
If you are growing moisture-loving types like Japanese Iris, choose a spot where the soil stays consistently moist. But for sun-loving, drought-tolerant types like Bearded Iris, pick the sunniest and best-drained area in your garden.
Soil For Irises
Irises thrive in well-drained, fertile soil with a slightly acidic to neutral pH (6.5-7.0). Heavy clay soil that holds water can cause root rot, especially for rhizome types. If your soil is compacted, mix in compost to improve texture and drainage.
You can also add a little sand if drainage is very poor. I always check that water does not sit in the planting area after rain. If it does, the soil needs improvement.
Moisture-loving irises are more flexible, but even they do not like standing water for long periods unless they are grown specifically for pond edges.
How to Plant Iris Rhizomes
Planting rhizomes correctly is very important. Many beginners bury them too deep, which leads to poor flowering or rot.
Dig a shallow hole (4–6 inches deep and 10–12 inches wide) and create a small mound of soil in the center. Place the rhizome on top of the mound and spread the roots down the sides. The top of the rhizome should remain slightly visible above the soil surface. Do not completely cover it.
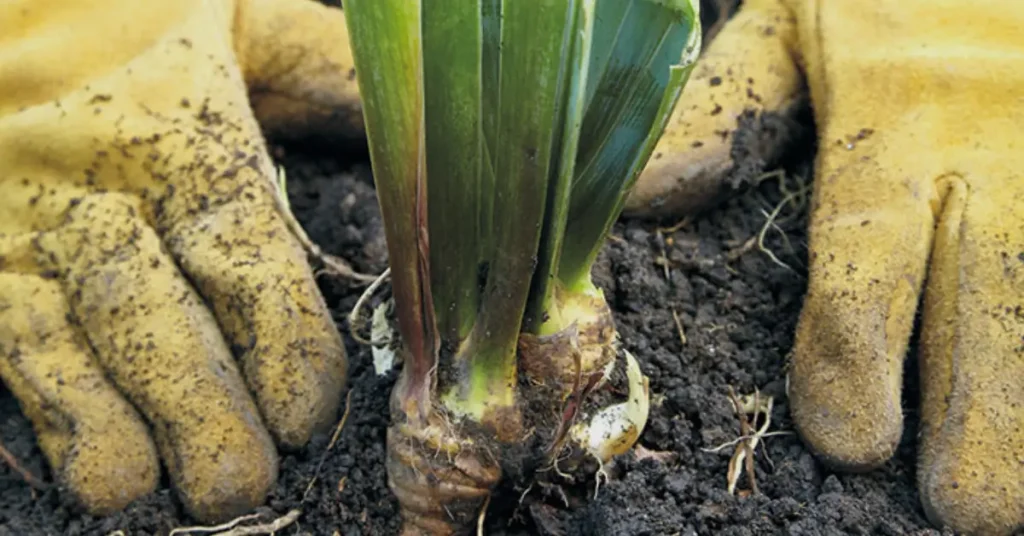
Space each plant about 12 to 18 inches apart. This gives them room to grow and improves air circulation. Water lightly after planting to help the roots settle into the soil.
How to Plant Iris Bulbs
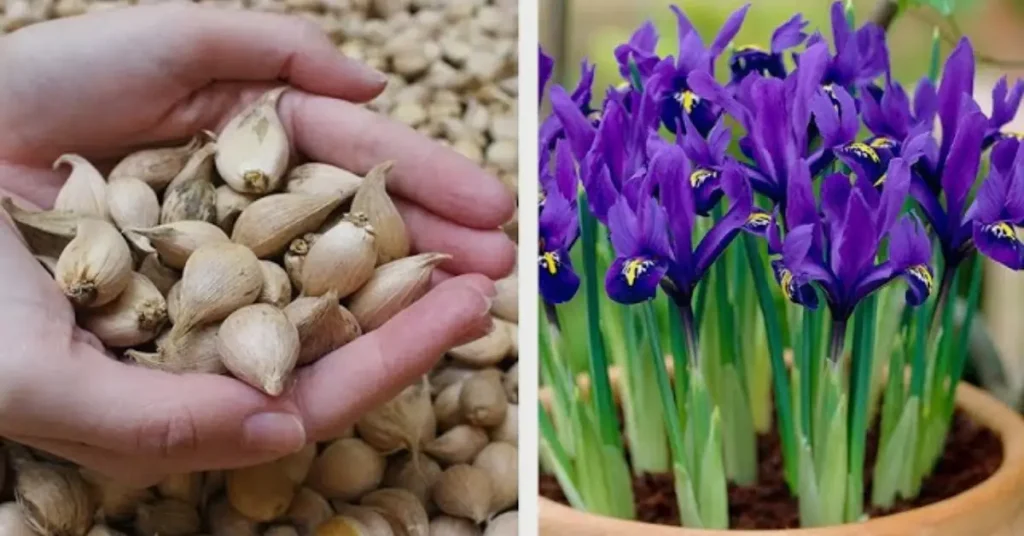
Unlike the common bearded irises that grow from thick rhizomes, “iris bulbs” usually refer to bulbous irises like Iris reticulata (dwarf or miniature irises) or Dutch irises. These true bulbs are small, onion-like, and planted deeper in the ground.
These little irises are perfect for rock gardens, borders, pots, or front-of-bed displays.
Here’s a simple, step-by-step guide in easy words to plant iris bulbs successfully.
When to Plant Iris Bulbs
The best time is fall (September–November), about 6–8 weeks before the ground freezes. This lets roots establish before winter for strong spring flowers.
- In cooler zones (3–6), plant in early to mid-fall.
- In warmer areas, late fall works fine.
- If it’s spring now (March 2026), you can still plant potted or pre-sprouted bulbs, but fall planting gives the best results. Bulbs planted in spring may bloom later or skip the first year.
Step-by-Step Planting Guide
Choose the Right Spot Pick a place with full sun (at least 6 hours of direct sunlight daily). Avoid low, wet spots where water pools, as soggy soil causes rot. Rock gardens, raised beds, or containers are good to go.
Prepare the Soil Loosen the soil 8–10 inches deep. Mix in compost or grit/sand for better drainage if your soil is heavy clay. No heavy fertilizers at planting.
Dig the Holes Dig holes or a trench about 3–4 inches deep for most dwarf reticulata types, or 4–5 inches deep for taller Dutch irises. Make the holes wide enough for groups (they look best planted in clusters).
Place the Bulbs Set each bulb with the pointed tip facing up and the flat or rooty base down.
- Space bulbs 3–6 inches apart (closer for a fuller look in pots or borders).
- Plant in groups of 5–10 or more for the best show.
Cover the bulbs with soil. Firm lightly with your hands to remove air pockets. Water after planting to settle the soil and start root growth. In fall, natural rain often helps; just keep soil moist but not soggy.
Apply a low-nitrogen, balanced fertilizer in early spring. Divide clumps every 3-5 years when blooms decrease.
Insect Pests on Irises
| Pest | Signs / Damage | Prevention & Solutions |
|---|---|---|
| Iris Borer | Holes in leaves, chewed tunnels, mushy rhizomes, frass (sawdust-like poop), wilted fans. Most serious pest, especially in East/Midwest. | Sanitation: Remove & destroy all old iris leaves/debris in late fall or early spring (before April). – Divide rhizomes regularly; cut out & trash infested parts. – Organic: Apply beneficial nematodes (Heterorhabditis or Steinernema) to soil in late spring/early summer. – Chemical: Spray spinosad, pyrethrins, acephate, or permethrin when leaves are 3–6 inches tall (repeat every 2 weeks if needed). – Crush visible larvae by hand when dividing. |
| Aphids | Clusters of tiny green/gray/black bugs on leaves/buds; sticky honeydew, curled leaves, stunted growth; can spread viruses. | Blast off with strong hose water every few days. Organic: Insecticidal soap spray (or mild dish soap solution); repeat after rain. – Encourage ladybugs & other beneficial insects. Chemical: Neem oil, malathion, or imidacloprid if heavy infestation. |
| Thrips | Silver streaks or spots on leaves/flowers; distorted buds; tiny fast-moving insects. | Remove & destroy affected parts. Organic: Insecticidal soap or neem oil sprays. – Chemical: Products with bifenthrin, permethrin, or spinosad. – Keep area weed-free for better air flow. |
| Slugs & Snails | Irregular holes in leaves (often at night); slimy trails; worst on young shoots/seedlings. | Hand-pick at night with flashlight. – Organic: Beer traps, crushed eggshells/copper barriers, or beneficial nematodes. – Iron phosphate baits (safe for pets/wildlife). – Avoid over-mulching; improve drainage. |
| Earwigs | Chewed holes in leaves/flowers; nocturnal pests with pincers. | Trap in rolled newspaper or tuna cans with oil. – Organic: Insecticidal soap sprays. – Reduce hiding spots (debris, mulch piles). |
| Spider Mites (less common) | Fine webbing, stippled/yellow leaves; tiny specks on undersides. | Hose off regularly. – Organic: Insecticidal soap or neem. – Increase humidity if indoors/potted. |